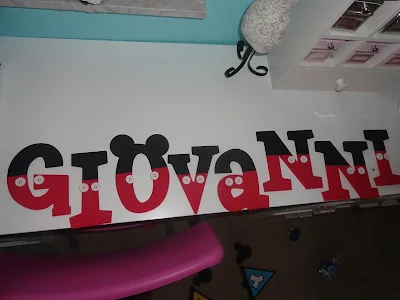
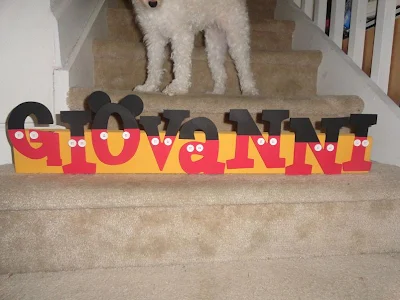
Beautiful Mickey Shaped Sign!
It is ideal to make names, Happy Birthday signs, or whatever you want.
You need:
- Letters to make the sign. You can design them on word art, word, or you can buy them made of wood, for example.
- Black and red poster board with temperas. You can use another kind of paper or other paints. If you are going to make the sign for a girl, use pink or fuchsia colours with white polka dots.
- White buttons: 2 for each letter, if you are going to make a Mickey sign. If it is going to be a Minnie one, use a red or fuchsia white polka dot ribbon (same color as the paper),
- Glue and scissors.
Instructions:

When the letters are ready (if they are printed out on paper, you have to be more careful to work on them), paint each half with black and red temperas... or stick the paper if you are using it. You may see in the picture that they started painting the black part first. I recommend you to make it in the other way around. If you paint by accident the black part with the red tempera, you can fix it by painting this part with black colour.
If you are going to use the Mickey style, put on top the buttons (two per each word).
For the O letters (if you choose a name without O letters, pick a rounded letter, or if you have i or j letters on the dot over in lower case), add two little circles made of black poster board to make the ears.

If you are doing a sign using a Minnie style, keep in mind to add white polka dot ribbons between the ears, or in the corner of one of them.
It will be better if you place the letters a little bit disorderly on a mustard yellow background. Use this colour for a Mickey sign, and make it with pink colour if it is a Minnie one. Your kids will love it!
From atstudio
Labels: 2d, Mickey Clubhouse, Mickey Mouse, photo tutorial, signs, tutorial


No comments
Post a Comment